Planter
Wreath
Today is the
first official day of Fall! What better way to embrace it then to hang up some
fall themed wreaths?
This one I actually made last
year. The scarecrow is from a previous
decoration. He used to have a body and
perched on a dowel but the dowel snapped in half so I decided to repurpose his
head as the center piece for this wreath.
The wicker tray was given to me by a friend and the foliage was either
from my on hand stash or the dollar store.
He is the official greeter when guests stop by : )
This basket
wreath is very similar to the frame wreath I shared in my previous post. I like the idea of using different items for
the frame work.
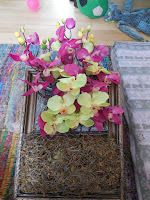
The grape
vine basket was found recently at the local Value Village and I thought it
would be perfect for this wreath idea. I
cut the floral foam to fit within the basket snugly.
The leaves were inserted around the front of the basket
to hide the floral foam.
I
did the flower arranging in the same fashion as the frame wreath. Starting with the main flowers, and then
filling in with leaves and branches. Then the white daisies.
This one is on the
front door facing the street. I think
the black-eyed susans could be a little taller, perhaps? Overall though, it adds
some much needed colour to the front of the house.
Small Frames and Pine Cone Flowers
In my first post I had mentioned my collection of random
frames stored away in the attic. I have
a couple of these small ones that I thought were cute and wanted to do something
creative with. I had made pine cone
flowers before and wanted to use them with the frames somehow. After trying different ideas, I came up with
the following:

The giraffe and cheetah are from scrap fabric. I painted the frames a peach colour then rubbed in some clear wax. I painted the flower ‘petals’ with a mix of pink and peach acrylic paint. I also did the pine cone scales using both colours, changing the patterns to add interest. The arrangements were then hot glued to the frame.
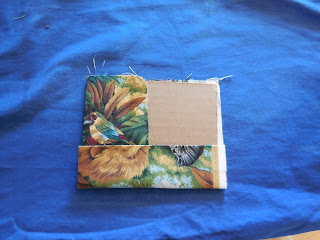
I’m including a few pictures on how I fitted the fabric to
the frame. First, I ironed the piece of fabric to make it nice and
smooth. Then folded the fabric around a piece of cardboard so that
the images would be where I wanted them on the front side.
I
then ran the iron over the folds.
Having the fabric wrapped around
the edges made the cardboard fit nice and snug within the frame so no gluing
was required.
Something a little different but I
like how they turned out.
Since I didn’t take any ‘in
progress’ shots of cutting the pine cones, I thought I would add a couple links
to show the various ways people have come up with to make pine come flowers.
The method I used does require a strong hand and cutting source but it gets the
job done. These other methods I would
definitely try as well!
Thanks for stopping by!


